野外求生系列 - PowerShell 壓縮 ZIP 檔
| | | 2 | |
同事在 Windows 10 高高興興寫了壓縮檔案的 PowerShell 小工具,丟上伺服器執行時踢到鐵板。
PowerShell 有個 Compress-Archive Cmdlet 可壓縮 ZIP 檔,甚至能串接 PowerShell 輸出管線,例如:Get-ChildItem -Path C:\Reference\Afile.txt, C:\Reference\Images\Bfile.txt | Compress-Archive -DestinationPath C:\Archives\PipelineFiles.zip,寫起來道地又方便。但有個問題 - Compress-Archive 要 PowerShell 5.0+ 才能用,Windows Server 2012R2 內建的 PowerShell 版本還是 4.0,登楞!
這次遇到的狀況也偏野外求生,希望做到不安裝或升級軟體、不部署工具程式,就地取材靠 Notepad 就完成任務。
PowerShell 寫了一陣子,現在的我已能淡定面對這類狀況,舉凡 PowerShell 做不到的事,交給 .NET 就對了。C# 既出,誰與爭鋒?
.NET 4.5 起加入 System.IO.Compression 命名空間工具組,其中 ZipFile.CreateFromDirectory() 能直接將整個資料夾壓成 ZIP,最接近我們的需求。所以,原本的 Compress-Archive 指令:
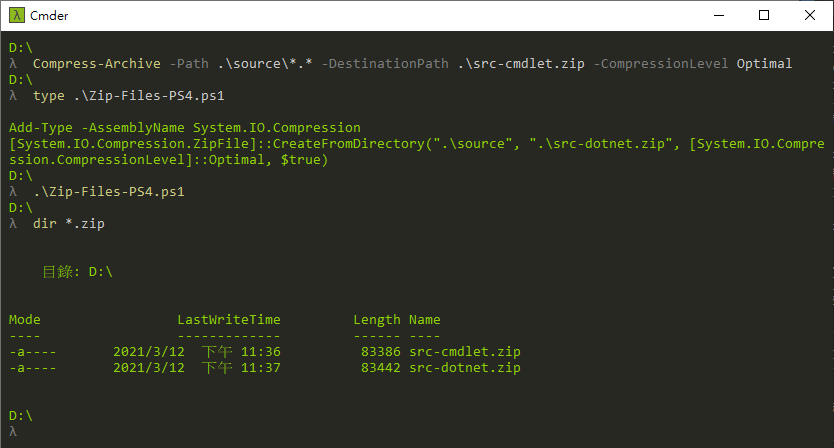
Compress-Archive -Path .\source\*.* -DestinationPath .\src-cmdlet.zip -CompressionLevel Optimal
可簡單改寫成:
Add-Type -AssemblyName System.IO.Compression
[System.IO.Compression.ZipFile]::CreateFromDirectory(".\source", ".\src-dotnet.zip", [System.IO.Compression.CompressionLevel]::Optimal, $true)
沒流什麼汗就解決囉。
不過,測試過程發現 Compress-Archive 有個缺點,CreateFromDirectory() 有個 bool includeBaseDirectory 參數能決定 ZIP 中的檔案要不要包含基底目錄(本例為 source,可參考下圖的差異),但 Compress-Archive 沒得選擇,source 底下的清單直接出現在 ZIP 根目錄:
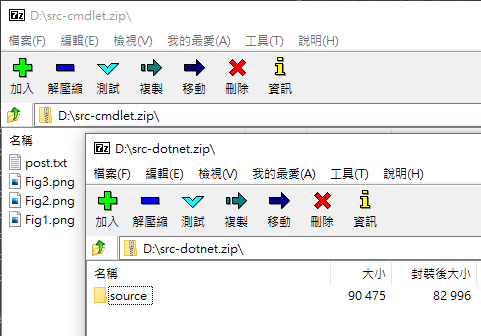
查了一下,這是已知問題,大家常用的解法是先建個暫存目錄把 source 放進去,改壓縮暫存目錄以模擬 source 層,之後再清掉暫存目錄,說來挺鳥的,但也是種解法啦。如果是我,會選擇改用 .NET ZipFile.CreateFromDirectory() 較省事。
【2022-09-20 更新】感謝讀者 ari 分享,Compress-Archive 來源路徑結尾加上萬用字元(*)可省略基底目錄。參考:Compress a directory that excludes the root directory
Example of creating ZIP file from directory with PowerShell 4.
Comments
# by ari
今天用 Compress-Archive 時遇到同樣的問題,爬文之後發現在下 Path 參數時直接用萬用字元,壓縮檔就不會有基底目錄了 底下指令 "不會" 包含基底目錄 Compress-Archive -Path "D:\Source\*" -DestinationPath "D:\Source.zip" -CompressionLevel Optimal 底下指令 "會" 包含基底目錄 Compress-Archive -Path "D:\Source\*.*" -DestinationPath "D:\Source.zip" -CompressionLevel Optimal
# by Jeffrey
to ari, 感謝分享,有查到官方說明,已補充於本文。