復古精簡版 HTML5 動畫進度條 (CSS 圖層混色特效 + 香草自訂元素)
 |  | 0 |  |  |
前幾天用 CSS + 自訂網頁元素刻了香草 3D 骰子,好久沒寫前端寫出興趣來,最近有另一個需求是想做上傳進度條。類似的東西十年前做過,當時是用 Knockout.js MVVM。
盤點十年下來我用的前端框架從 Knockout.js 換 Angular.js 再轉到 Vue.js,經歷過兩次砍掉重練。前端框架與工具更換速度之快,素來讓人聞風喪膽,我做全端只有淺嚐就夠嗆了,在此向以前端開發為志業的攻城獅們致敬!
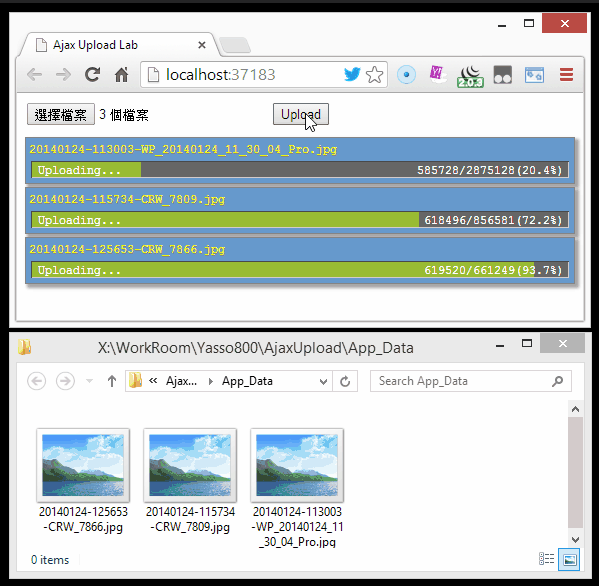
之前做的版本 UI 走精緻風,用陰影做立體效果:

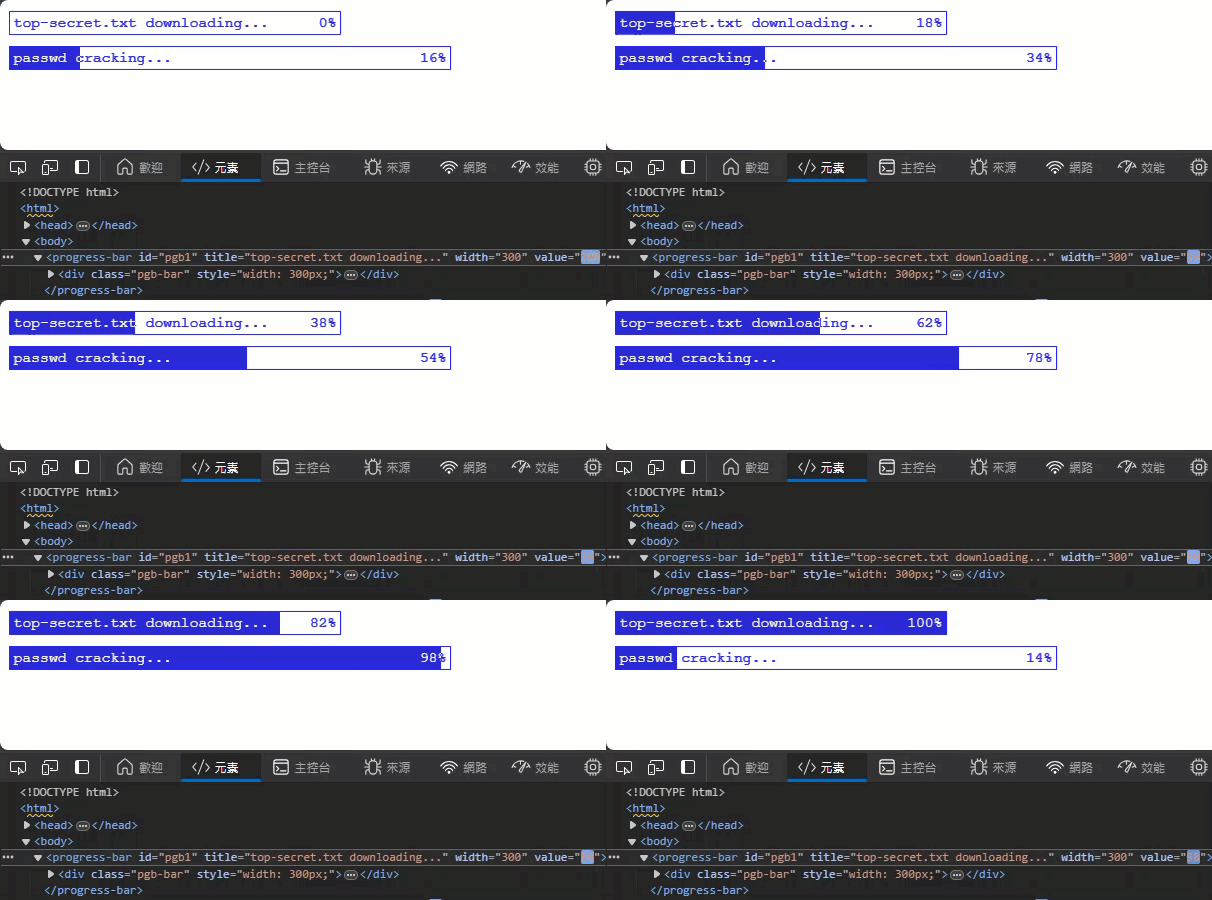
這回我想玩玩不同風格,走純文字復古風,簡單文字加底色變化,底色涵蓋部分的文字顏色反白,像這樣:

這次最大收獲是學會用 CSS mix-blend-mode: difference 依文字跟背景色差異值(絕對值)決定顯示顏色,我選用純藍 rgb(0,0,255) 跟純黃色 rgb(255,255,0) 實現白底藍字特效。要準備三個元素,示意如下:
<div class="白底">
    <div class="藍底" style="容器 P% 寬度"></div>
    <div class="黃字" style="mix-blend-mode: difference">文字</div>
</div>
藍底未涵蓋範圍,黃字 rgb(255,255,0) 與白底 rgb(255,255,255) 計算差異值為 rgb(0,0,255) 為藍字。而有藍底的部分則為 rgb(255,255,0) - rgb(0,0,255) = rgb(255,255,255) 呈現白字。
【延伸閱讀】
- CSS mix-blend-mode-直接在網頁呈現Photoshop的圖層混合模式 by 一代網頁設計
- Dynamic text effects with css mix-blend-mode by Kai Oswald
如上面動畫展示看到的,這次我還是選擇把進度條包成自訂 HTML 元素 <progress-bar title="顯示文字" value="進度百分比" width="寬度">,這回再多學了如何用 title、value、width 等 Attribute 決定顯示文字、進度百分比及寬度。做法是用 observedAttributes() 傳回要監聽的 Attribute 名稱,在 attributeChangedCallback(name, oldValue, newValue) 加上依 Attribute 值改變元素行為的程式邏輯。如此修改 value 值傳入 0 - 100 數字即可改變進度條百分比。
註:若使用 createElement() 方式新增自訂 HTML 元素,在 constructor() 不可操作 DOM,需移到 connectedCallback() 方法,否則會發生 Failed to construct 'CustomElement': The result must not have children 錯誤。
完整程式碼如下,另外也有線上展示:
<!DOCTYPE html>
<html>

<head>
    <style>
        :root {
            --pgb-fill-color: rgb(0, 0, 255);
            --pgb-text-color: rgb(255, 255, 0);
        }

        .pgb-bar {
            width: 400px;
            height: 1.5em;
            background-color: white;
            border: 1px solid var(--pgb-fill-color);
            position: relative;
            opacity: 0.85;
            font-size: 10pt;

            [pgb-bg] {
                background-color: var(--pgb-fill-color);
                position: absolute;
                width: 0%;
                height: 100%;
                top: 0;
                left: 0;
                filter: saturate(80%);
            }

            [pgb-tw] {
                color: var(--pgb-text-color);
                mix-blend-mode: difference;
                text-align: left;
                margin-left: 0.25em;;
                line-height: 1.5em;
                font-family: 'Courier New', Courier, monospace;

                [pgb-p] {
                    float: right;
                    margin-right: 0.25em;
                    margin-top: 0.0.5em;
                }
            }
        }
    </style>
    <style>
        progress-bar {
            display: block;
            margin: 10px 0;
        }
    </style>
</head>

<body>
    <progress-bar id="pgb1" title="top-secret.txt downloading..." width="300"></progress-bar>
    <progress-bar id="pgb2" title="passwd cracking..." value="15"></progress-bar>
    <script>
        class ProgressBar extends HTMLElement {
            static get observedAttributes() {
                return ['value', 'title', 'width'];
            }
            constructor() {
                super();
            }
            connectedCallback() {
                this.innerHTML = `
        <div class="pgb-bar">
            <div pgb-bg></div>
            <div pgb-tw><span pgb-t></span><span pgb-p></span></div>
        </div>
        `;
            }
            attributeChangedCallback(name, oldValue, newValue) {
                if (name === 'value') {
                    let percentage = parseInt(newValue);
                    if (isNaN(percentage) || percentage < 0) percentage = 0;
                    else if (percentage > 100) percentage = 100;
                    this.querySelector('[pgb-bg]').style.width = `${percentage}%`;
                    this.querySelector('[pgb-p]').textContent = `${percentage}%`;
                }
                else if (name === 'title') {
                    const title = newValue || 'title attr not defined';
                    this.querySelector('[pgb-t]').textContent = newValue;
                }
                else if (name === 'width') {
                    const width = parseInt(newValue) || 400;
                    this.querySelector('.pgb-bar').style.width = `${newValue}px`;
                }
            }
        }
        customElements.define('progress-bar', ProgressBar);

        setInterval(() => {
            document.querySelectorAll('progress-bar').forEach(pgb => {
                let value = parseInt(pgb.getAttribute('value') || '0');
                value += 2;
                pgb.setAttribute('value', value);
                if (value > 100) pgb.setAttribute('value', 0);
            });
        }, 100);

    </script>
</body>

</html>
A simple progress bar made with custom HTML element with CSS mix-blend-mode: difference.
Comments
Be the first to post a comment