TIPS-為XAML按鈕加入向量圖案
 |  | 0 |  |  |
網路上看到有人佛心地分享免費Metro Style Icon圖組(共300枚),開心下載準備試用。
身為XAML界的菜鳥,解壓縮後卻有些茫然,AI、EPS、Font-Face、PDF、PSD、SVG,都是業界標準的向量圖檔儲存規格,但是要怎麼應用在XAML程式? 我一頭霧水。
爬文後大致有些頭緒,有幾種做法:
- 最簡單玩法,使用適當的檢視工具開啟檔案,擷取畫面,當成一般圖檔使用。但如此會失去向量自由縮放特性,且若圖案複雜,很難完美去背與背景融和,向量的意義盡失。
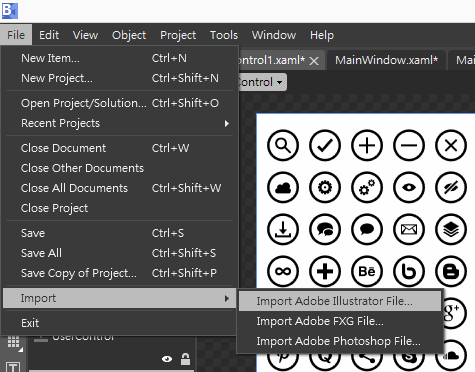
- 使用Microsoft Expression Design或Blend可以匯入AI(Adobe Illustrator)檔,直接轉成XAML。

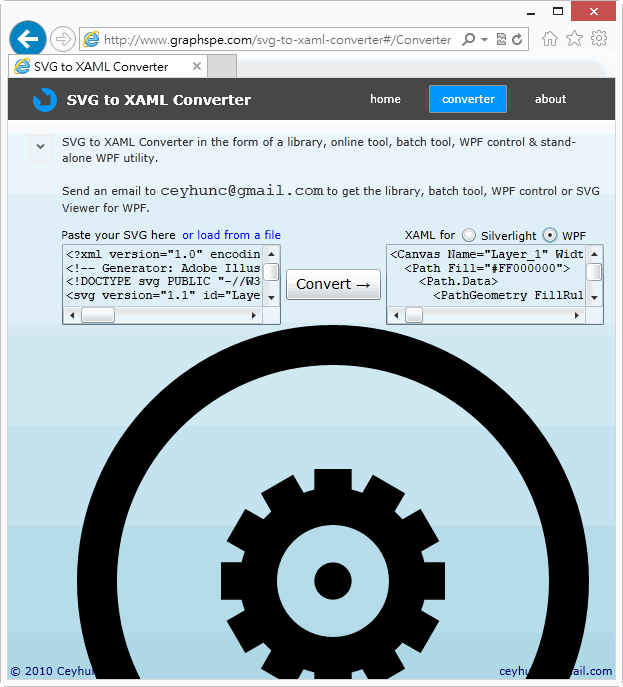
- SVG轉XAML線上服務: 貼上或上傳SVG檔案,可線上轉換成XAML並直接在瀏覽器中檢視

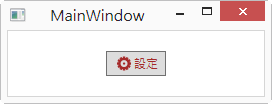
經實際練演,我覺得使用VS2012內附的Blend for Visual Studio 2012協助是較簡便的做法。決定來個練習題,試著取出Settings圖示中的小齒輪,試著拼裝出如下的按鈕:

步驟:
- 使用Blend for Visual Studio 2012匯入Metrize_Icons.ai到空白UserControl
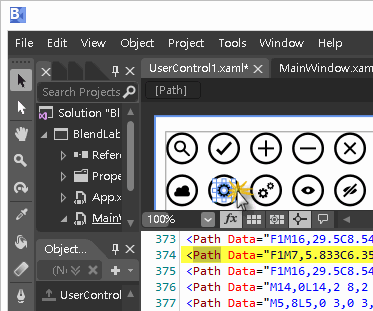
- 點選小齒輪,Blend會自動指出其對應的XAML語法(下圖中的塗黃的<Path>)

- 將該段Path置入<Button>內容,配上<TextBlock>文字,即告完成!
<Button Height="25" Width="60" Foreground="Brown">
<Grid>
<Grid.ColumnDefinitions>
<ColumnDefinition Width="20"></ColumnDefinition>
<ColumnDefinition Width="*"></ColumnDefinition>
</Grid.ColumnDefinitions>
<Viewbox Grid.Column="0" Margin="3">
<Canvas Width="14" Height="14" ClipToBounds="True">
<Path Height="14" Canvas.Left="0" Canvas.Top="0" Width="14"
Fill="{Binding Foreground, RelativeSource={RelativeSource FindAncestor, AncestorType={x:Type Button}}}"
Data="F1M7,5.833C6.355,5.833 5.833,6.355 5.833,7 5.833,7.644 6.355,8.166 7,8.166 7.645,8.166 8.167,7.644 8.167,7 8.167,6.355 7.645,5.833 7,5.833 M7,10.5C5.068,10.5 3.5,8.933 3.5,7 3.5,5.068 5.068,3.5 7,3.5 8.934,3.5 10.5,5.068 10.5,7 10.5,8.933 8.934,10.5 7,10.5 M14,8.166L14,5.833 12.716,5.833C12.669,5.602,12.584,5.386,12.511,5.166L13.645,4.511 12.478,2.49 11.347,3.143C11.192,2.97,11.029,2.808,10.856,2.654L11.511,1.522 9.49,0.355 8.836,1.49C8.614,1.416,8.399,1.331,8.167,1.284L8.167,0 5.833,0 5.833,1.284C5.603,1.331,5.387,1.416,5.167,1.489L4.512,0.355 2.49,1.521 3.144,2.653C2.971,2.807,2.809,2.969,2.654,3.142L1.522,2.488 0.355,4.509 1.49,5.164C1.416,5.385,1.331,5.601,1.284,5.833L0,5.833 0,8.166 1.284,8.166C1.331,8.398,1.416,8.614,1.489,8.833L0.354,9.49 1.521,11.511 2.654,10.857C2.809,11.031,2.971,11.193,3.145,11.346L2.49,12.48 4.511,13.647 5.167,12.51C5.387,12.583,5.603,12.669,5.833,12.715L5.833,14 8.167,14 8.167,12.715C8.397,12.669,8.614,12.583,8.836,12.509L9.49,13.646 11.512,12.479 10.857,11.345C11.031,11.191,11.192,11.029,11.348,10.855L12.48,11.509 13.646,9.488 12.511,8.832C12.584,8.612,12.669,8.398,12.716,8.166z" />
</Canvas>
</Viewbox>
<TextBlock Grid.Column="1" VerticalAlignment="Center">設定</TextBlock>
</Grid>
</Button>
補充程式重點:
- 將<Path>置入相同寬、高的<Canvas>,外部加上<Viewbox>是要讓圖案能依所在容器自由縮放
- 使用<Grid>分割兩欄決定圖示與文字的配置
- <Path>的塗色應保持與<Button>的Foreground一致,故使用以下Binding技巧
Fill="{Binding Foreground, RelativeSource={RelativeSource FindAncestor, AncestorType={x:Type Button}}}"
嗯,算是從"操作介面簡陋到爆的無美感工程師"進化成"會偷借現成圖示美化介面的笨拙工程師"了。


Comments
Be the first to post a comment