【潛盾機】將檔案結構匯成Excel文件
| | | 5 | |
看圖說故事好了。有個存放專案檔案的資料夾:
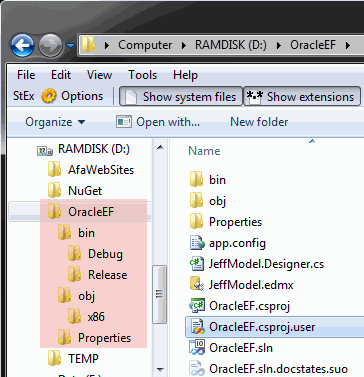
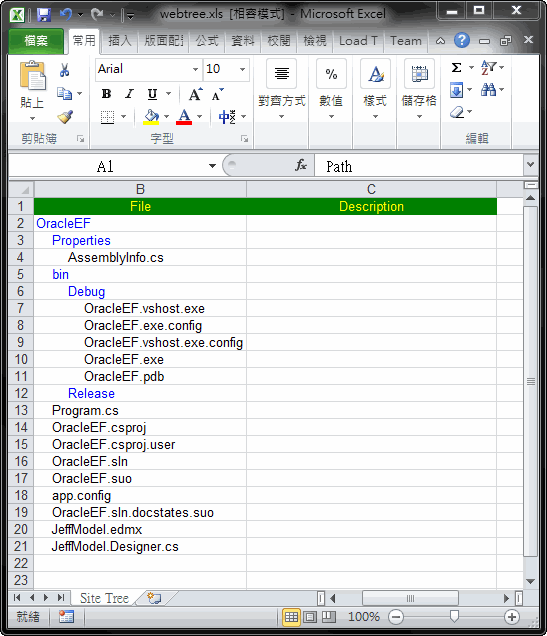
因專案管理要求,需匯出依資料夾層級縮排的Excel文件樣式如下,方便填寫目錄或檔案說明:
其中還有一點小要求是希望能彈性地略過某些目錄、檔案,例如: obj目錄。覺得這是個很好的NPOI練習題材,於是我寫了以下的小工具:
namespace DumpWebTree{ using System; using System.Collections.Generic; using System.Linq; using System.Text; using System.Xml.Linq; using System.IO; using NPOI.HSSF.UserModel; using NPOI.SS.UserModel; using NPOI.HSSF.Util;public static class Utility
{ //簡易的目錄/檔案資料物件public class WebItem
{public int Layer; //目錄深度
public bool IsFolder; //是否為目錄
public string Name; //目錄或檔案名稱
public string Path; //完整路徑
public WebItem(string path, int layer, bool isFolder = false)
{Name = System.IO.Path.GetFileName(path);
IsFolder = isFolder;
Path = path;
Layer = layer;
}
}
//用遞迴巡弋所有目錄、檔案private static void explore(List<WebItem> list, string path, int layer)
{WebItem folder = new WebItem(path, layer, true);
list.Add(folder);
foreach (string d in Directory.GetDirectories(path))
explore(list, d, layer + 1);
foreach (string f in Directory.GetFiles(path))
{ WebItem file = new WebItem(f, layer + 1);list.Add(file);
}
}
//使用Extension Method擴充方法,以較簡便方式建立CellStylepublic static ICellStyle QuickCreateStyle(
this HSSFWorkbook wb,short foreColor, //前景色
short backgroundColor = -1, //背景色
HorizontalAlignment textAlignment = HorizontalAlignment.LEFT
)
{var style = wb.CreateCellStyle();
var font = wb.CreateFont();
font.Color = foreColor;
style.SetFont(font);
if (backgroundColor >= 0) {style.FillForegroundColor = backgroundColor;
style.FillPattern = FillPatternType.SOLID_FOREGROUND;
}
style.Alignment = textAlignment;
return style;}
/// <summary> /// 將目錄下的目錄檔案結構匯出成Excel工作表 /// </summary> /// <param name="dirPath">要匯出的目錄路徑</param> /// <param name="excelPath">匯出Excel路徑</param> /// <param name="filter">過濾函數,傳入Path進行判斷,傳回true時表排除</param>public static void WebTreeToExcel(
string dirPath, string excelPath,
Func<string, bool> filter = null)
{ //將目錄結構整理成清單 List<WebItem> list = new List<WebItem>();explore(list, dirPath, 0);
//建立Excel HSSFWorkbook wb = new HSSFWorkbook(); var sheet = wb.CreateSheet("Site Tree");var row = sheet.CreateRow(0);
var styleHeader = wb.QuickCreateStyle(
HSSFColor.YELLOW.index, HSSFColor.GREEN.index,
HorizontalAlignment.CENTER);
//寫入標題 int colIndex = 0;foreach (string colName in "Path;File;Description".Split(';'))
{var cell = row.CreateCell(colIndex++);
cell.SetCellType(CellType.STRING);
cell.SetCellValue(colName);
cell.CellStyle = styleHeader;
}
//建立Folder Stylevar styleFolder = wb.QuickCreateStyle(HSSFColor.BLUE.index);
int rowIndex = 1;foreach (var item in list)
{ //若bypass檢測傳回true,則略過該筆if (filter != null && filter(item.Path))
continue;row = sheet.CreateRow(rowIndex++);
//將Path放在第一欄(稍後隱藏)var cell = row.CreateCell(0);
cell.SetCellValue(item.Path);
//存入檔名或目錄名cell = row.CreateCell(1);
if (item.IsFolder)cell.CellStyle = styleFolder;
cell.SetCellType(CellType.STRING);
cell.SetCellValue(new String(' ', item.Layer * 4) + item.Name);
}
//第一欄隱藏 sheet.SetColumnHidden(0, true); //自動伸縮欄寬sheet.AutoSizeColumn(1);
sheet.SetColumnWidth(1, sheet.GetColumnWidth(1) + 256);
sheet.SetColumnWidth(2, 100 * 256);
using (FileStream fs = new FileStream(excelPath, FileMode.Create)) {wb.Write(fs);
}
}
}
}
程式不算多,不到150行,但其中用了遞迴、擴充方法(Extension Method)[延伸閱讀: 91的介紹文]、Func<string, bool>,寫得蠻開心的。(謎之聲: 大家眼睛看得很花,好嗎?)
程式不好讀不打緊,使用方法倒挺簡單,傳入要掃瞄的目錄、要匯出的Excel檔路徑,再寫個小函數由路徑決定哪些項目要排除,就OK囉!
namespace DumpWebTree{ class Program {static void Main(string[] args)
{Utility.WebTreeToExcel(
@"D:\OracleEF", "d:\\webtree.xls",
(path) =>
{ //若路徑中包含\obj,不管目錄或檔案都要排除if (path.Contains(@"\obj")) return true;
//其餘納入清單中return false;
});
}
}
}
【後記】
之前我用NPOI都是拿來讀取Excel,產生Excel的情境較少,這次算是補足原本欠缺的經驗。建立Excel時,要設定顏色、字型、寬度等眉眉角角的細節很多,我找到作者Tony Qu的部落格,提供了很多很棒的教學文章,推薦大家參考: NPOI - Tony Qu - 博客园
另外,專案要引用NPOI時,請愛用NuGet,可以不用手動下載、安裝、加參考,搞到大粒汗小粒汗囉~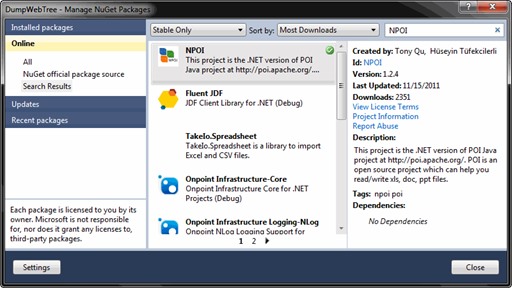
Comments
# by 路人A
why not LINQ to EXCEL ? I think that LINQ to EXCEL is easier then NPOI.
# by Jeffrey
to 路人A,據我了解,LinqToExcel只提供讀取功能(http://demo.tc/Post/639)。不過,若針對純讀取,LinqToExcel的確是很優秀的解決方案,謝謝補充。
# by LouisDeng
產生Excel寫那些style真的滿麻煩的 寫的時候都是類似的寫久了也就習慣了,但是維護起來真的很痛苦 同事想了一個方法,就是先把複雜的格式(如合併儲存格、設定分頁及列印方式 表頭表尾,此範例沒有)做成一個Excel,在產生Excel之前可以先把範本讀進來再把要動態產生的資料放進去,可以節省不少時間
# by 佑翔
親愛的黑大~ excel方面的東西,我覺得EPPlus不錯用 http://epplus.codeplex.com/ 這個東西是based on Open Office Xml 操作簡便,可讀可寫 NPOI已經被我放逐了~~
# by Jeffrey
to 佑翔, 看起來比NPOI和藹可親多了,API規格更符合.NET風格,謝謝推薦! (主要的限制是無法向下相容到Excel 2003,但隨著時光飛逝,我想這點的重要性會逐漸降低 XD)