使用 ASP.NET Core 快速打造 Windows Service - 以 Headless Chrome 網頁抓圖為例
 |  | 7 |  |
先前介紹過好用的 Headless Chrome 可以擷圖、轉存 PDF 與爬資料,手邊有個應用想將其整合為網站功能,理論上從 C# 啟動外部程式 chrome.exe 即可搞定,但如同在背景執行 Office Word/Excel 有個挑戰。Word/Excel/Chrome 原本為前景程式,依賴使用者 Profile 且對執行權限也有較多要求,故常遇到的狀況是用 Visual Studio 測試除錯正常(因為 Dev Server 或 IIS Express 是以開發者登入帳號執行),等部署到 IIS 改用 AppPool 專屬帳號執行卻屢屢卡住無回應讓人傻眼。
以 Headless Chrome 為例,有種簡單解法是將呼叫 Chorme 的功能抽取成迷你獨立 ASP.NET 網站,將其 IIS AppPool 設定成一般使用者(並建議只開放本機存取),運轉前可先用該使用者身分登入 Windows 執行一次 Chrome,確保 Profile 資料已初始化,即可在 ASP.NET 網站執行 Headless Chrome。(註:務必將有特殊要求的功能拆成小網站分離處理,切忌為此修改整個 ASP.NET 網站的執行身分,以避免提高資安風險)
除了改 IIS 執行身分,我常用的另一種技巧是將這類功能包成 Windows Service 以指定使用者帳號執行並限定本機存取。之前我習慣用 NancyFx (參考:NancyFx-打造小型 WebAPI 與 Microservice 的輕巧利器) 處理這類情境,隨著 ASP.NET Core 的推出,其輕巧簡便性不輸 NancyFx,最酷的是 ASP.NET Core 支援 Windows Service 執行模式,所以這回我們來試試用 ASP.NET Core 打造一個 Headless Chrome 抓圖 Windows Service,順便巡覽 ASP.NET Core 的核心結構,以求練武強身。註:此類服務有被當成跳板機的風險,請參考文末提醒。
首先,打開 Visual Studio 2017 建立 ASP.NET Core 2.1 專案,為求簡潔我連 MVC/Controller 都省了,開專案時選 Empty 開局:
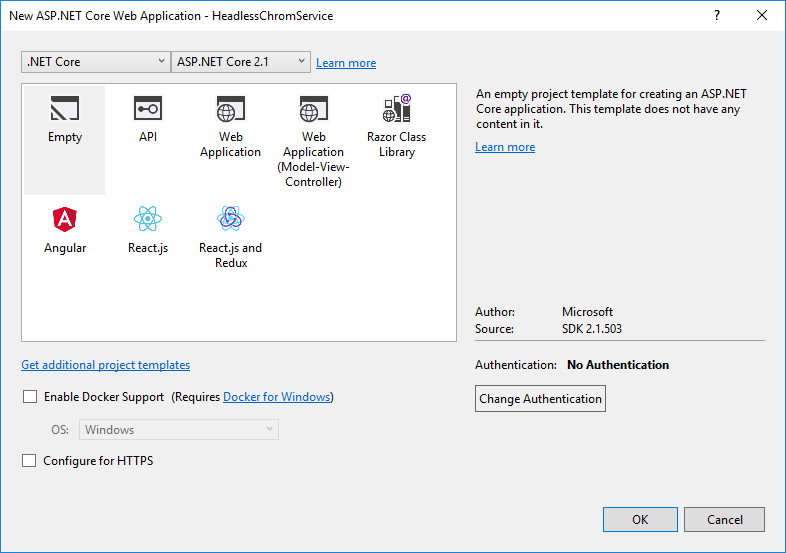
Empty 模版所建立的專案結構極簡單,就只有一個 Program.cs 與 Starup.cs。Program.cs 是啟動網站的主程式所在:
using System.Collections.Generic;
using System.IO;
using System.Linq;
using System.Threading.Tasks;
using Microsoft.AspNetCore;
using Microsoft.AspNetCore.Hosting;
using Microsoft.Extensions.Configuration;
using Microsoft.Extensions.Logging;

namespace HeadlessChromeService
{
    public class Program
    {
        public static void Main(string[] args)
        {
            CreateWebHostBuilder(args).Build().Run();
        }

        public static IWebHostBuilder CreateWebHostBuilder(string[] args) =>
            WebHost.CreateDefaultBuilder(args)
                .UseStartup<Startup>();
    }
}
Main() 是程式進入點,呼叫 CreateWebHostBuilder() 取得 IWebHostBuilder,執行 Build() 建立並配置網站,再執行 Run() 啟動網站。在 CreateWebHostBuilder() 中,WebHost.CreateDefaultBuilder() 封裝了網站配置、Logging、與 Kestrel/IIS 整合等細節,接著呼叫 UseStartup<Startup>(),依 Startup 類別內的邏輯定義網站所需服務、設定執行 Pipeline 等。
預設的 Startup.cs 長這樣:
public class Startup
{
    // This method gets called by the runtime. Use this method to add services to the container.
    // For more information on how to configure your application, visit https://go.microsoft.com/fwlink/?LinkID=398940
    public void ConfigureServices(IServiceCollection services)
    {
    }

    // This method gets called by the runtime. Use this method to configure the HTTP request pipeline.
    public void Configure(IApplicationBuilder app, IHostingEnvironment env)
    {
        if (env.IsDevelopment())
        {
            app.UseDeveloperExceptionPage();
        }

        app.Run(async (context) =>
        {
            await context.Response.WriteAsync("Hello World!");
        });
    }
}
app.Run() 這段定義如何處理 URL 請求,預設規則為不管連到哪個路徑,一律回應 Hello World!。
對於以上運作想更深入了解的同學可參考:
- ASP.NET Core 基本概念
- Exploring Program.cs, Startup.cs and CreateDefaultBuilder in ASP.NET Core 2 preview 1
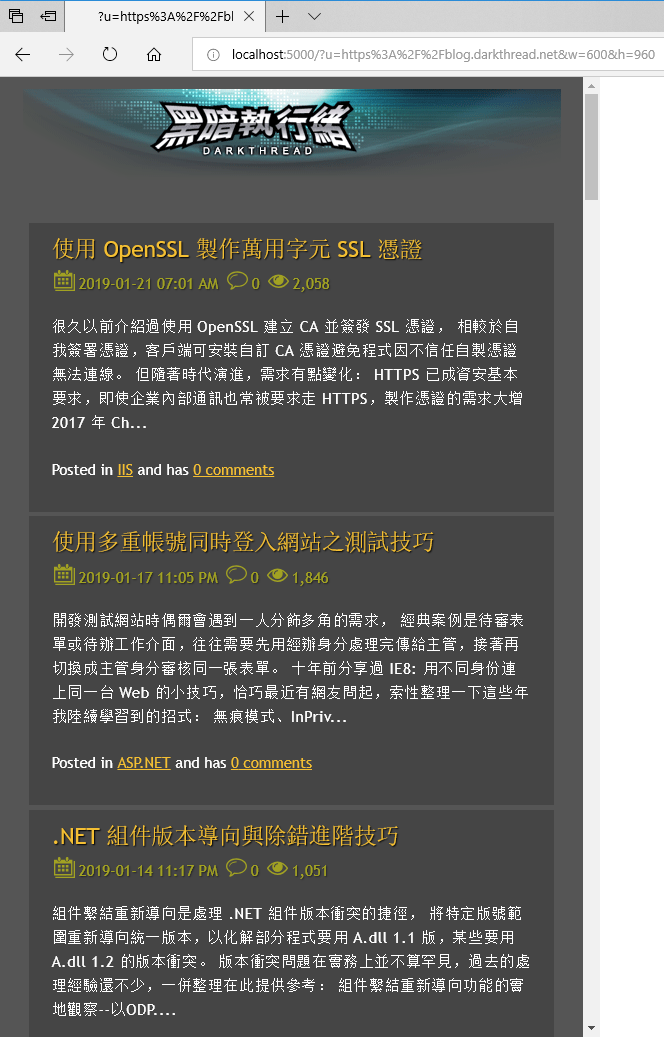
接著我用最簡單的寫法將回傳 Hello World 改寫成接收網址、尺寸等參數,並傳回該網頁畫面擷圖的服務。構想是透過 u、w、h 三個 QueryString 參數傳入網址(記得要 HttpUtility.UrlEncode 或 encodeURIComponent() 編碼)、寬度與高度,二話不說呼叫 Headless Chrome 抓圖,吐回 png。
app.Run(async (context) =>
{
    //await context.Response.WriteAsync("Hello World!");
    Process p = null;
    context.Response.ContentType = "text/plain";
    try
    {
        var url = context.Request.Query["u"];
        if (string.IsNullOrEmpty(url))
            throw new ApplicationException("missing parameter - u");
        if (!int.TryParse(context.Request.Query["w"].FirstOrDefault(), out var w))
            w = 1024;
        if (!int.TryParse(context.Request.Query["h"].FirstOrDefault(), out var h))
            h = 768;
        var tmpFile = Path.GetTempFileName() + ".png";
        var si = new ProcessStartInfo()
        {
            CreateNoWindow = true,
            FileName = @"C:\Program Files (x86)\Google\Chrome\Application\chrome.exe",
            Arguments =
                $"--headless --disable-gpu --window-size={w},{h} --screenshot={tmpFile} {url}",
            UseShellExecute = false,
            RedirectStandardError = true
        };

        p = Process.Start(si);
        p.WaitForExit(5000);

        if (File.Exists(tmpFile))
        {
            var img = File.ReadAllBytes(tmpFile);
            File.Delete(tmpFile);
            context.Response.ContentType = "image/png";
            await context.Response.Body.WriteAsync(img, 0, img.Length);
        }
        else await context.Response.WriteAsync("Failed");

    }
    catch (Exception ex)
    {
        if (p != null)
        {
            try
            {
                //若Process仍存在,清除之
                Process.GetProcessById(p.Id);
                p.Kill();
            }
            catch
            {
                // ignored
            }
        }
        await context.Response.WriteAsync(ex.Message);
    }
});
這樣子一個簡單的傳參數取圖檔功能就完成了~
下一步我們來體驗 ASP.NET Core 的威力,加幾行程式把它轉成 Window Service。
(官方文件有完整說明:在 Windows 服務上裝載 ASP.NET Core)
首先從 NuGet 安裝 Microsoft.AspNetCore.Hosting.WindowsServices 程式庫:
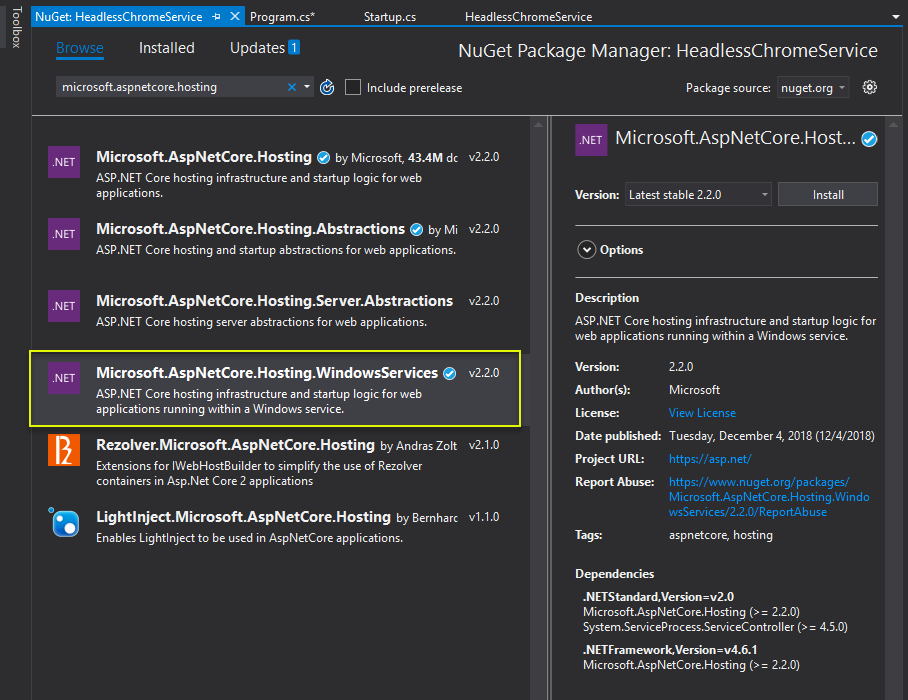
我們對 Program.cs 稍作修改,先 using Microsof.AspNetCore.Hosting.WindowsServices 以擴充 RunAsService() 方法,在 Main() 裡依據參數決定要 .Run() 跑 Console 模式或是 .RunAsService() 跑成 Windows Service。
public static void Main(string[] args)
{
    var isService = !(Debugger.IsAttached || args.Contains("--console"));

    if (isService)
    {
        //將工作目錄指向ContentRoot
        var pathToExe = Process.GetCurrentProcess().MainModule.FileName;
        var pathToContentRoot = Path.GetDirectoryName(pathToExe);
        Directory.SetCurrentDirectory(pathToContentRoot);
    }

    var host = CreateWebHostBuilder(
        //剔除--console參數
        args.Where(arg => arg != "--console").ToArray()).Build();

    if (isService) host.RunAsService();
    else host.Run();
}
再來是調整 .csproj 設定,指定 RuntimeIdentifier(RID) 為 win7-x64,設定 SelfContained = true 使用 SCD (Self-Contained Deployment) 打包 ASP.NET 相關程式庫並輸出成 .exe ,IsTransformWebConfigDisabled 則是設定不要輸出 web.config。
  <PropertyGroup>
    <TargetFramework>netcoreapp2.1</TargetFramework>
	<RuntimeIdentifier>win7-x64</RuntimeIdentifier>
	<SelfContained>true</SelfContained>
	<IsTransformWebConfigDisabled>true</IsTransformWebConfigDisabled>
  </PropertyGroup>
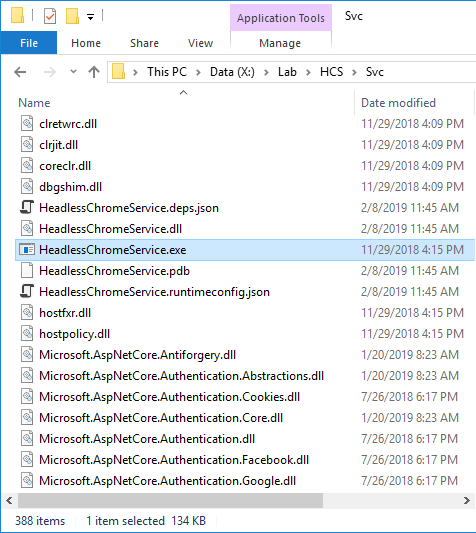
使用 Visual Studio 2017 發佈(Publish)網站,可得到如下檔案,SCD 部署包含 .NET Core 程式庫,檔案較多,有近 400 個檔案約 100MB,好處是部署時不需安裝 .NET Core,複製檔案就能執行。
下一步是使用 sc.exe 註冊並啟動服務:(如果要為服務另建專屬執行帳號,記得要授與檔案目錄存取權限,建議用該帳號登入執行一次 Chrome 以確保 Profile 初始化完成及功能正常。)
sc create WebSnapshotService binPath= "X:\Lab\HCS\Svc\HeadlessChromeService.exe" obj= "JEFFWin10\jeffrey" password= "{PASSWORD}"
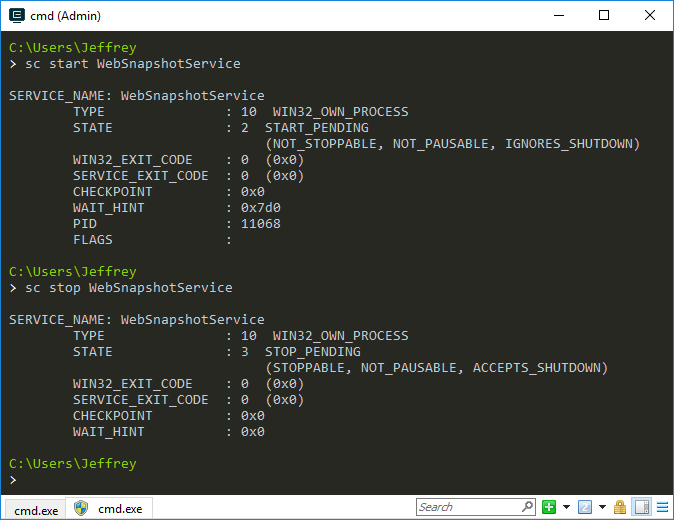
安裝完成後,ASP.NET Core 便能透過 SC START/STOP 啟動停止,一個簡單的 Windows Service 就做好囉~
ASP.NET Core 預設聽 5000 Port,當主機上有多個服務要錯開監聽 Port,可利用先前教過的指定 ASP.NET Core Kestrel 接聽 Port技巧,在 exe 所在目錄放個 appSettings.json 指定不同 Port。
{
	  "Kestrel": {
		"EndPoints": {
			"Http": {
				"Url": "http://localhost:5123"
			}
		}
	  }
}
重要提醒
由於網頁擷圖具有接收參數瀏覽任意 URL 的特性,必須提防被當成跳板機做壞事,在指定 EndPoint 時宜限定 localhost,若要開放遠端客戶端呼叫,請務必限定來源 IP。
This article desmotsrate how to use ASP.NET Core to build a simple web page snapshot service and convert it to Windows service easily.
Comments
# by SoonYang
報告:「補充:chrome.exe 完整參數清單」之超連結有誤~
# by Jeffrey
to SoonYang, 感謝提醒,已修正。
# by Yesh
.net core + headless chrome 在爬取网页的时候 怎么设置ua+cookie呢?比如我想爬取微信的页面 一般网站都会设置ua判断 如果不是微信的ua是不能直接访问到内容的
# by Jeffrey
to Yesh,Headless Chrome 的行為比照 Chrome,我覺得不應有缺 UserAgent 的問題。能提供更具體的錯誤重現步驟?
# by dancewithwolf
你最后那一步对我非常有帮助,非常感谢
# by Evance
您好 在 sc create 那段語法中有點小問題, "binPath=" 後面要上空格
# by Jeffrey
to Evance, 感謝指正,已修改。(今天才發現有這個眉角)